Edamame Noodles with Meat Sauce and Brussels Sprouts

You eat with your eyes first and foremost.  This dish is a colorful take on normal spaghetti and meat sauce.  These noodles are certified organic, vegan, kosher, and gluten free, and have become a staple in our household.  

I also use certified organic grass-fed lean beef.  Again, not that you have to go strictly organic, but I prefer as much organic food and produce as possible.

I pair this meal with Brussels Sprouts sautéed on the stove with olive oil a little pinch of pink Himalayan sea salt and black ground pepper!

Picture


Ingredients:

  • 1 pound of Organic lean beef
  • 2-3 cloves of garlic
  • 1/2 to 1 small onion
  • 1  28oz. can of organic diced tomatoes
  • Edamame noodles or regular noodles (the amount will vary)
  • 1 bag of Brussels sprouts
  • 1 Teaspoon dried basil, oregano and parsley (if you have fresh herbs that will work too)

Directions:

  1. Dice onions. Add some olive oil to the bottom of the pan and put diced onions on heated pan.  Then add your chopped garlic on top of the onions (this is done so the garlic doesn’t over cook and burn). By adding olive oil you are adding a little bit of (healthy) fat this helps to prevent the meat from sticking and burning in the pan.
  2. Once onions are translucent add your ground beef  and make sure it is thoroughly cooked
  3. Add can of diced tomatoes and add the basil, oregano, and parsley
  4. Season with salt and pepper
  5. In a pot add your water to the pot to cook your noodles.


Optional:
For this meal I paired the spaghetti with caramelized Brussels Sprouts.

  1. Rinse and chop ends of the Brussels Sprouts
  2. In the same pan or a separate pan add some olive oil to the bottom
    Add Brussels Sprouts to the pan and make sure they are evenly distributed on the bottom of the pan to cook evenly.
  3. I like when the Brussels Sprouts begin to caramelize which really brings out the delicate sweetness. Make sure to cook them until they are browned not burnt so stirring every 10 minutes can help avoid any catastrophe!

Enjoy!!

Creamy Pumpkin Pie Bars

pumpkin-bar-final-picture-4_3.jpgHi friends!  I hope everyone is enjoying this splendid fall weather! 

I mentioned that I would be sharing a recipe with Pumpkin and that day is here.  With everything from pumpkin spiced latte to pumpkin beer to flavored dog treats there truly is pumpkin for all. 

I am so thrilled to share with you  my creamy pumpkin pie bars!  Not only are they vegan, but gluten and dairy free too!


Pumpkin Health Benefits:

  • High in Carotenoids, specifically beta-carotene (which gives pumpkins their distinct orange color) is converted to Vitamin A.
    • Carotenoids help your skin, teeth, eyes, and skeletal tissues just to name a few.
    • Carotenoids are powerful antioxidants that can help prevent against certain types of cancers. 
    • Carotenoids can help protect against heart disease.
    • Carotenoids help boost the immune system
  • High in Fiber
  • Low in Calories


Recipe Ingredients:

  • 1/5 c. dates pitted
  • 1 c. pecans
  • 2 teaspoons vanilla extract
  • Pinch of sea salt
  • 1/5 c. cashews soaked in water overnight in refrigerator
  • 1/3 c. coconut sugar or maple syrup
  • ½ – ¾ c. unsweetened pumpkin puree1 teaspoon pumpkin pie spice


Directions:

  • In a blender or food processor pulse dates, pecans, sea salt and vanilla extract.  
  • Place parchment paper in 8 inch square casserole dish.
  • Transfer mixture into an 8-inch square casserole dish. With your hands press mixture together and down towards the dish so that the ingredients stick together, this layer will be the “crust”.
  • Next, in a food processor or blender combine raw cashews that have soaked in water overnight (or at least for 1 hour) with coconut sugar or maple syrup, pumpkin puree, and pumpkin pie spice.
  • Spread this mixture as a second layer on top of the date and pecan crust. Lastly, add a sprinkling of crushed pecans on top.
  • Place dish in the freezer to set overnight. Store in the freezer.

Enjoy!


Homemade Applesauce

applesauce-final-product_5.jpg
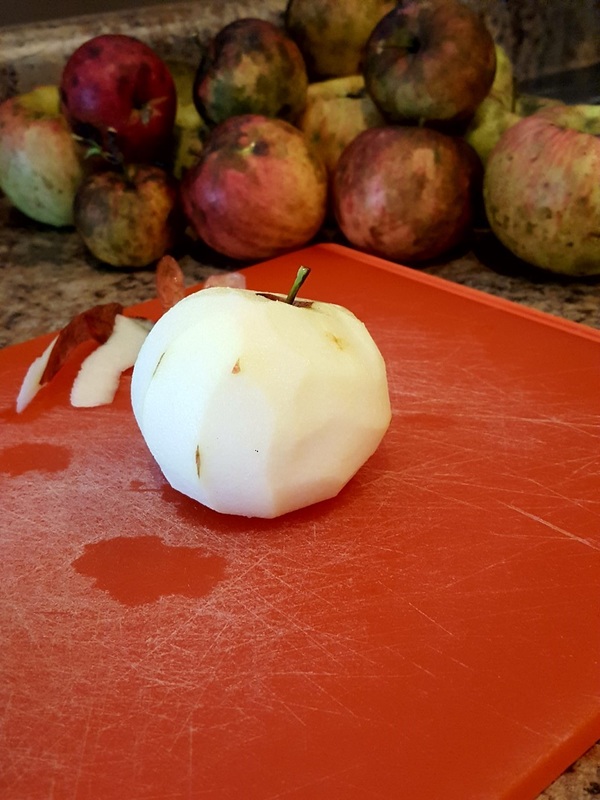
It’s that time of year again when the warm dog days of summer ever so slowly fade into the frosty, chilly, vibrant colored afternoons…ahhh it’s fall and nothing says welcome to fall quite like homemade applesauce!  Okay, well so does pumpkin, BUT that’s for a later post!

When the apples are picked from your backyard or from your local farmers market I just can not get enough!   As the old adage goes “An apple a day will keep the doctor away.”

Apples have quite the rap sheet of health benefits. Don’t worry I’m not going to rattle off everything about apples but here is a small list of just some of the amazing benefits:

  • Rich in antioxidants (cancer fighting)
  • High in dietary fiber
  • Loaded with phytonutrients (flavonoids and polyphenolics) which is a 1, 2 punch for optimal health
  • Excellent source of B-vitamins
  • High in both Vitamin C and Beta Carotene as well as other minerals.

Again, this just a condensed list of health benefits of incorporating apples into your everyday lifestyle.  But don’t take my word for it…=)   Tis the apple-lovin’ season!

RECIPE:

  • 12-15 small to medium sized apples peeled and sliced
  • 1/4 c. cinnamon
  • 1/4 -1/2 c. Coconut sugar or regular sugar
  • 1-1.5 c. of water

DIRECTIONS:

This is a super easy and super delicious recipe. 

  1. Peel and slice the apples.
  2. Cut and remove the inner part of the apple, seeds, and stem. 
  3. Slice or dice apples and place them into your pan on the stove. 
  4. Add water to cover to bottom of a sauce pan.
  5. Cook the apples on medium to low heat. 
  6. Keep stirring the apples making sure they do not burn.  As the apples start to cook keep stirring and adding water to the pan so they do not burn. 
  7. Add your cinnamon and sugar and keep stirring.
  8. Once apples are cooked turn off your stove. 
    • If you like a chunkier version of applesauce you can mash them or use a pastry cutter to get your desired consistency. 
    • If you prefer a smoother texture you can use a handheld electric puree machine or remove the apples and place in a food processor for a smoother applesauce.
  9. Taste the applesauce to see if you may need to add more sugar or cinnamon.

Enjoy!!