Baby Nursery!

Attachment-1 - Copy (27)Hello friends! I hope all is well with everyone! I apologize it has been way too long since my last blog. At any rate, I’m so happy that the temperatures are finally changing the birds are chirping, the grass is that beautiful spring green, and flowers are in full bloom!!!

My precious Angel is 3 months old and I CAN NOT believe how fast she is growing and changing. It really is remarkable! Time certainly is flying by and I am trying to capture and take in as much as I can. I realize this blog may be a bit late but today is all about her nursery and the color pattern I chose for her room. How many of you find a color pattern you like and think okay this is what I am going to go with only to find out weeks or months later that maybe you would have designed it differently? Well, I can say that this is not one of those instances. I just love her nursery and the colors I decided on and I am happy to report back to you all that I LOVE it!!! Rosé Pink, Champagne Gold, and silvery gray are colors that are timeless in their own rite.

Attachment-1 - Copy (29)

My inspiration piece was my floor lamp I purchased from Kirkland’s awhile back, even before I was pregnant. This piece was not only my inspiration for the nursery but also for Ava’s baby shower back in December.  This piece had the champagne gold and silvery gray perfectly intertwined which became the colors I wanted as my base colors for the nursery. My husband painted the walls a ‘Basalt Powder’ light gray from Lowe’s which I just absolutely love. I found that a lighter paint, especially shades of whites and grays are perfect to paint over or keep in the future especially when it comes time to change or transition her nursery into a big girl room.  But, let’s not get ahead of ourselves just yet, I want to soak in these baby days of my sweet little angel pie.

Attachment-1 - Copy (28)

Since I had the gold tone and gray tones covered, I wanted a third color of pink, but not just any pink, but a subtle elegant rosé or blush pink to blend with the other two colors. It brings in that third element of whimsy I wanted in her room. My bedding is from Sweet Jo Jo, and I choose the blush pink and gold polka dots pattern to mesh and fuse the three colors together! Plus, this bedding blended perfectly with the light gray walls and the white-cream colored crib.

Attachment-1 - Copy (30)

As for the crib, dresser, and changing table I just adore so much because it’s the color I didn’t know at the time I wanted.  We found this set almost immediately, after realizing the initial nursery furniture we thought we wanted was WAY too dark. Originally, we thought we wanted a gray color crib set, but when we saw the actual crib, dresser, and changing table the colors were way TOO dark for the nursery. Which if you can, seeing a display of the furniture before you buy it really helped us in knowing what to expect as well as making our final decision.  At that point, I knew I wanted a white or off-white crib set and thankfully we found this beautiful and sturdy crib set at Costco and we got it for an incredible deal which made it even better!!

The electric recliner was also from Costco because it was COMFORTABLE!!! Friends and family all told us to find a chair that would be comfortable for those long sleepless nights. Well they weren’t kidding either. This recliner has paid for itself in comfort alone and I will say even though you hear what your family is telling you at the time about this and that for the baby you don’t always take heed and do what they’re saying.  Or 9 times out of 10 you honestly forget the advice from your well intentioned family members because this moment you are  experiencing is all brand new and you have a lot of information coming at you that sometimes the most well intended advice can certainly get lost in the shuffle. But, this advice about having a comfortable chair in the nursery didn’t escape either one of us.  This rocking recliner is extremely comfortable and is a must have in the nursery second to the crib…of course!

The floor rug I found at Ross department stores and I must say that I do have a few other sheepskin rugs and NONE of them are as thick and cushiony as this one. By far the softest rug I have ever purchased.  The backing of the rug is very well padded which makes it very comfortable to stand on.  Not only was this rug probably the cheapest rug I have ever bought, but it’s been able to stand the test of running the vacuum over and over it without ruining it.  This rug brings in a softer texture to the wood floors my husband put in her nursery, by grounding the room together with a bit of feminine whimsy and warmth.

As for the other decorations in the room, they are either from family and friends, or things I already had bought but were in a different room serving little to no purpose.

I will say that my husband is still planning on putting up metal floating shelves on the wall to store and display her book collection. But that is it. Her nursery is complete and we both love it. I may decide to add a bit more colorful pictures on the wall when she gets a bit bigger. That way she will have something colorful to look to focus on and explore.  Besides that, we were both quite pleased with how it all came together and eventually turned out.

I promise I won’t take this long to write my next blog! Thank you so much for stopping by and have a wonderful week!


XOXO,

Megan

Halupki…aka stuffed Cabbage Rolls

What the heck is Halupki????

Attachment-1 - Copy (23)
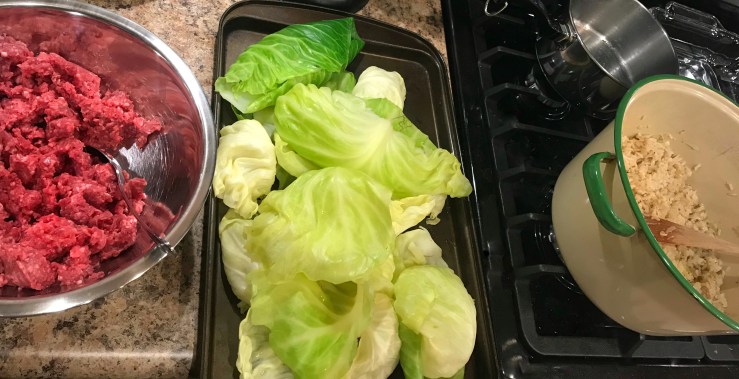
Is it a Ukrainian dish or is it a Russian dish?  Or maybe it’s a Polish or Slovak dish?

Irregardless of the exact place of origin; Halupkis are enjoyed in more cultures than you might think. To be honest a version of Halupki are enjoyed and shared in all of the above cultures as well as others I haven’t even listed for example; Hungary has their version too.

It make sense combining the use of any meat, rice and cabbage as  a family staple for many cultures because of the ease of availability to grow your own crops like cabbage and raise your animals.  To distinguish ingredients and even the name to call it comes down directly from what each culture refers to it.  Some families may add a few extra ingredients and others may omit some ingredients.  In the end, it’s all in how you were brought up making and ultimately eating them. Plus, if your grandmother and her mother made them a certain way and you are lucky enough to still enjoy the time honored traditional family recipe you will follow it to a T, in order to preserve and keep those traditions passed down the family tree.

Attachment-1 - Copy (16).jpeg

Besides having a family recipe that literally hasn’t changed for generations, I also am using one of the pots my grandmother Julia, had in her kitchen which is incredibly nostalgic and just amazing to me.  Even after all this time, something she used in her kitchen to feed her family, is still being used generations later.  I also wanted to highlight how well this pot has stood the test of time.

After the cabbage was boiled and I cut off the last leave of usable cabbage I dumped my cabbage water and used this same pot to cook my brown rice. Since this was my first solo attempt of making Halupki without my mom, I did not want to make many dirty pots and pans so I just reused this pot. I thoroughly washed my brown rice and then added it to boiling hot water and cooked until done.  In a sperate frying pan, I added a few teaspoons of Virgin Olive Oil, and sautéed a medium onion and garlic and set aside until rice was done.

Attachment-1 - Copy (21)

In a sperate bowl, I have my thawed beef  waiting to be added to the brown rice.

Attachment-1 - Copy (20).jpeg

This picture below is just a quick snapshot of how I have everything set up in my kitchen. I mixed the raw meat with the brown rice and onion and stirred thoroughly making sure the rice and meat were blended.

Attachment-1 - Copy (19).jpeg

As I finished combining ingredients I was able to wash the pots in between.  So now, that the raw meat and brown rice are mixed I’m ready to stuff my cabbage leaves.

Attachment-1 - Copy (23).jpeg

Before baking the Halupki make sure you thoroughly mix the tomato soup and sauce, then add it to the baking dish.  Once you have mixed the liquid ingredients and lined the baking dish it’s time to bake and serve!

Attachment-1 - Copy (22).jpeg

I have been fortunate enough to grow up eating these delicious lean meat filled cabbage rolls and LOVE them.  So much that I also have altered the ingredients to make them meatless for myself.

I have been fortunate to be able to spend quality time before holidays and over the summer months at my parents’ house and was able to help my mom make these delicious homemade Halupki.  Watching her boil the correct sized cabbage leaves, making the rice and adding the right amount of onion and spices, realizing that you do not cook the beef, rather it has to be thawed and with the other ingredients added.  All the while my Mom showed me the proper way to stuff and roll the cabbage leaves before placing them into a large pot of sauce. These are amazing memories hat have been made and will always be cherished.

By the way I still haven’t got the hang of rolling the cabbage leaves as precise and perfect as my mom does it but hey it’s a start!

On a side note, the Halupki are actually tastier the next day.  It’s similar to many pasta dishes which often taste better the next day, after the flavors have had time to blend together. Halupki also freeze well and are convenient to pull out for a quick dinner anytime!

XOXO,

Megan


Enjoy!!!


Ingredients:

  • 1 medium sized head of cabbage
  • 1 pound of lean ground beef
  • 1 cup rice (I used brown rice)
  • 1 medium onion
  • 3 cloves of garlic
  • 1 can of tomato soup
  • 1-2 cups tomato sauce
  • Salt and Pepper

Directions:

  1. Fill a large soup pot with water to boil the head of cabbage.  Allow the water to come to a boil and gently place the cabbage head in.  With a fork and a knife keep turning the head of cabbage around allowing the outer layer of cabbage leaves to cook evenly.  Once the cabbage leaves start turning a brighter green cut the outer most layers of cabbage at the core and place on a separate baking sheet.
  2. When making the rice, it’s a 1:1 ratio of rice to meat.  Follow the directions on your box or bag for making 1 cup of rice.
  3. In a separate pan sauté onions and garlic to blend in the cooked rice.
  4. Mix raw meat and rice together and start stuffing the cabbage rolls.
  5. The cabbage leave when placed in your hand should have the harder core trimmed.  Try not to over stuff your cabbage leaves.  When adding the meat and rice to the roll add the mixture horizontally to the backbone of the cabbage leave and then slowly wrap the sides around the meat and place in baking dish.
  6. Once you have used up all the meat and rice mixture mix the tomato soup and pasta well and pour over Halupki filling the bottom of your baking dish.
  7. Bake 350 degrees for 50+minutes.  I usually go 65 minutes or until the top of the Halupki start to crisp up. Keep an eye on them if not sure of how long to leave them in beyond 50 minutes.

Happy Valentine’s Day!! Coconut Oil Rice Crispy Treats!

Attachment-1 - Copy (26)Ahh, yes the day of LOVE is finally upon us!!  No matter how you are celebrating or perhaps not celebrating this lovely holiday I’m sharing with you all a very effortless, sweet and might I add healthy treat to enjoy without the guilt.  It’s a cleaner version of Rice Crispy Treats. In my photo some of you may be wondering ‘where’s the chocolate?’ I understand completely so I am also linking the recipe for ‘Scotcharoos’ for those of you interested perhaps in a more decadent dessert with all the chocolate and peanut butter. Here you go: Happy Saint Patrick’s Day ~ Scotcharoos

Today,  I am sharing my coconut oil rice crispy treats for those of you who are searching for a healthier and much lighter sweet treat! It honestly, takes longer for these treats to set and firm up than it does to actually make them.  So it’s a ‘make it and forget about it’ type of dessert.

In a non-stick pan melt your oil and add your mini marshmallows.  I used non-flavored coconut oil because sometimes for me the taste of the coconut oil in certain combination of foods is a bit strong.  I found an coconut oil that is flavorless and usually use this in my recipes that call for oil, again it comes down to whatever is your preference.

On medium-low heat melt the oil and stir in the marshmallows.  Then add your vanilla extract and coconut milk.  Since, I did not want to open a large coconut milk container for the 3 teaspoons for this recipe, I simply used my non-dairy, gluten-free French vanilla creamer in place of the coconut milk.  Again, whatever your preference may be try it out and go with it.  I think almond milk would have also been sufficient as a replacement as well.

Once the marshmallows are about all melted and blended take the pan off the heat.  You are actually going to want to keep a bit of the marshmallow lumpy-bumps as you slowly stir and fold in your rice cereal.

Now, comes the part where you do need to have your cereal ready because once this marshmallow mixture is off the heat it really does start to rapidly cool.  So with that being said I had my cereal already measured out and ready to go.  I started off with one cup at a time and just kept folding it in until I felt all of the cereal was evenly coated.

Once the cereal is blended pour into a lightly greased pan.  Cover and allow an hour or so to settle and firm up.

I hope you all have a wonderful day celebrating with the one you love or that you are surrounded by those you love.  Have a wonderful day!

XOXO,

Megan


Ingredients:

  • 5 cups of Rice Crispy cereal
  • 4 Tsps. Coconut Oil
  • 1 tsp Vanilla Extract
  • 3 tsp Coconut Milk
  • 7-10 oz. of mini Marshmallows

Directions:

  1. Lightly grease an 8×8 pan (either with a coconut oil spray, or whatever you choose)
  2. In a large pan over medium heat add your coconut oil and melt. Once il is melted add your mini marshmallows and stir.
  3. Add your Vanilla extract and coconut milk and continue to stir until marshmallows are almost completely melted.
  4. Slowly add and fold the rice cereal until completely coated.
  5. Pour mixture into your greased pan.
  6. Let stand for an hour or so (it may need to set longer)
  7. Enjoy!